


How to build an AI Agent - Hands on tutorial on AI Medical Assistant
AI Agent 001

Introduction
In this tutorial, we'll guide you through creating an AI-Powered Medical History Assistant. This application uses OpenAI's language models to assist healthcare professionals by keeping track of patient histories, generating synthetic data, and facilitating conversations.
We are going to touch base upon the important components of the agent.
Let’s look at the high level block diagram of the Agent First,

The diagram above shows the integration of memory into an AI-driven Medical Assistant system. At the heart of this setup lies Mem0, a powerful memory module connected to a vector database like Qdrant. This allows the system to retrieve relevant patient history, ensuring the AI agent isn't starting from scratch with every query.
By combining this memory with OpenAI's advanced reasoning capabilities, the assistant can deliver highly contextual and accurate insights to doctors. In the sections ahead, we'll dive deeper into how each component—Mem0, vector databases, and GPT models—work together to enhance healthcare workflows.
The tutorial covers:
Block Diagram
Login
Patient data management with unique IDs
AI-powered chat for medical assistance
Sidebar interactions for patient profiles
Generating synthetic patient data
Running the application
By the end, you'll have a fully functional application!
Prerequisites
Before starting, ensure you have the following installed:
Python 3.8+ - For coding
Streamlit - For UI
OpenAI Python SDK - For calling OpenAI model
Qdrant or another vector database - For storing memories
Mem0 - For Memory layer
.envfile - For environment variables (e.g., API keys)
Install requirements from requirements.txt
Step 1: Setting Up the Application
1. User Authentication
Let’s start with security—it’s like having a locked door for your app. A simple login system (admin/admin) helps keep things accessible but private. This is just the basics—you can jazz it up later with database-backed authentication to keep things super secure. Plus, it helps the app remember who’s logged in and provides a personalized touch.
Key Functions:
login(): Handles login, validates credentials, and manages session state.

2. App Setup and Main Dashboard
Think of this as laying the foundation for your house. Streamlit helps us create a clean and friendly interface where doctors can interact seamlessly with the assistant. You’ll set up the app title, add descriptions, and make everything look inviting. It’s all about the first impression, right?
Below code is just for the header of the our AI Agent in streamlit App

Step 2: Integrating AI and Memory
Here’s where the magic happens. The MedicalHistoryAgent is like the brain of the assistant. It connects to OpenAI’s GPT model for intelligent responses and uses Qdrant for memory storage.
More steps on how to setup Qdrant locally : Setup qdrant locally
2.1 Configuring Memory
2.1.1 Why Memory Matters Here
Context Awareness: By accessing past patient data, the AI can give better and more personalized responses.
Efficiency: Doctors don't need to re-enter or recall past patient information manually.
Accuracy: Combining historical records with GPT's reasoning improves the relevance and quality of the output.
Scalability: Using vector databases ensures the system can handle a large number of patient records efficiently.
2.1.2 A key feature of this setup is the Mem0 memory system:
The AI Agent interacts with Mem0 to fetch relevant patient memory.
Mem0 uses a Vector Database (like Qdrant) to store and retrieve memory efficiently. Vector DBs are great for handling unstructured data like patient notes, conversations, or summaries, and performing similarity searches.
Relevant patient data (e.g., medical history, past queries, or previous results) is retrieved to enhance the AI Agent’s response.
Consider this as if you have discussed something with agent and it remembers for rest of its life.

2.2 Validating Patient IDs
To make sure we use a consistent format for patient IDs, such as PAT-XXXXX. we have added below logic where we would do a pattern matching based on the regex highlighted in below image.

Step 3: Adding Patient Data and Generating Synthetic Data
This step is optional and you can skip if you only want to work with AI Assistant.
3.1 Generating Synthetic Patient Profiles
Before working with real patient data, you need a sandbox to test things out. That’s where synthetic data comes in. Using OpenAI LLM model, you can create realistic mock profiles with medical histories, medications, and allergies. It’s like having a crash-test dummy for your app—safe, reliable, and super helpful for refining the experience.

Step 4: Building the Sidebar
The sidebar is the app’s control panel, where all the action begins. Doctors can input patient IDs, validate them, or generate synthetic data at the click of a button. Using Streamlit’s session state keeps the app interactive, so the sidebar updates dynamically as users interact.
When you click "View Patient Profile", the system quickly pulls up that user's memories from the database, checking if they're already in the system. This helps us provide a personalized experience by accessing their previous interactions and profile details.
Here is code for the same,

Step 5: Interactive Chat Interface
Now, for the part where the assistant really shines—the chat interface. This is where doctors can ask about patient histories, and the assistant responds intelligently and on point.

With GPT handling the heavy lifting, the replies are tailored, context-aware, and quick. It’s like having a virtual assistant who never takes a coffee break.
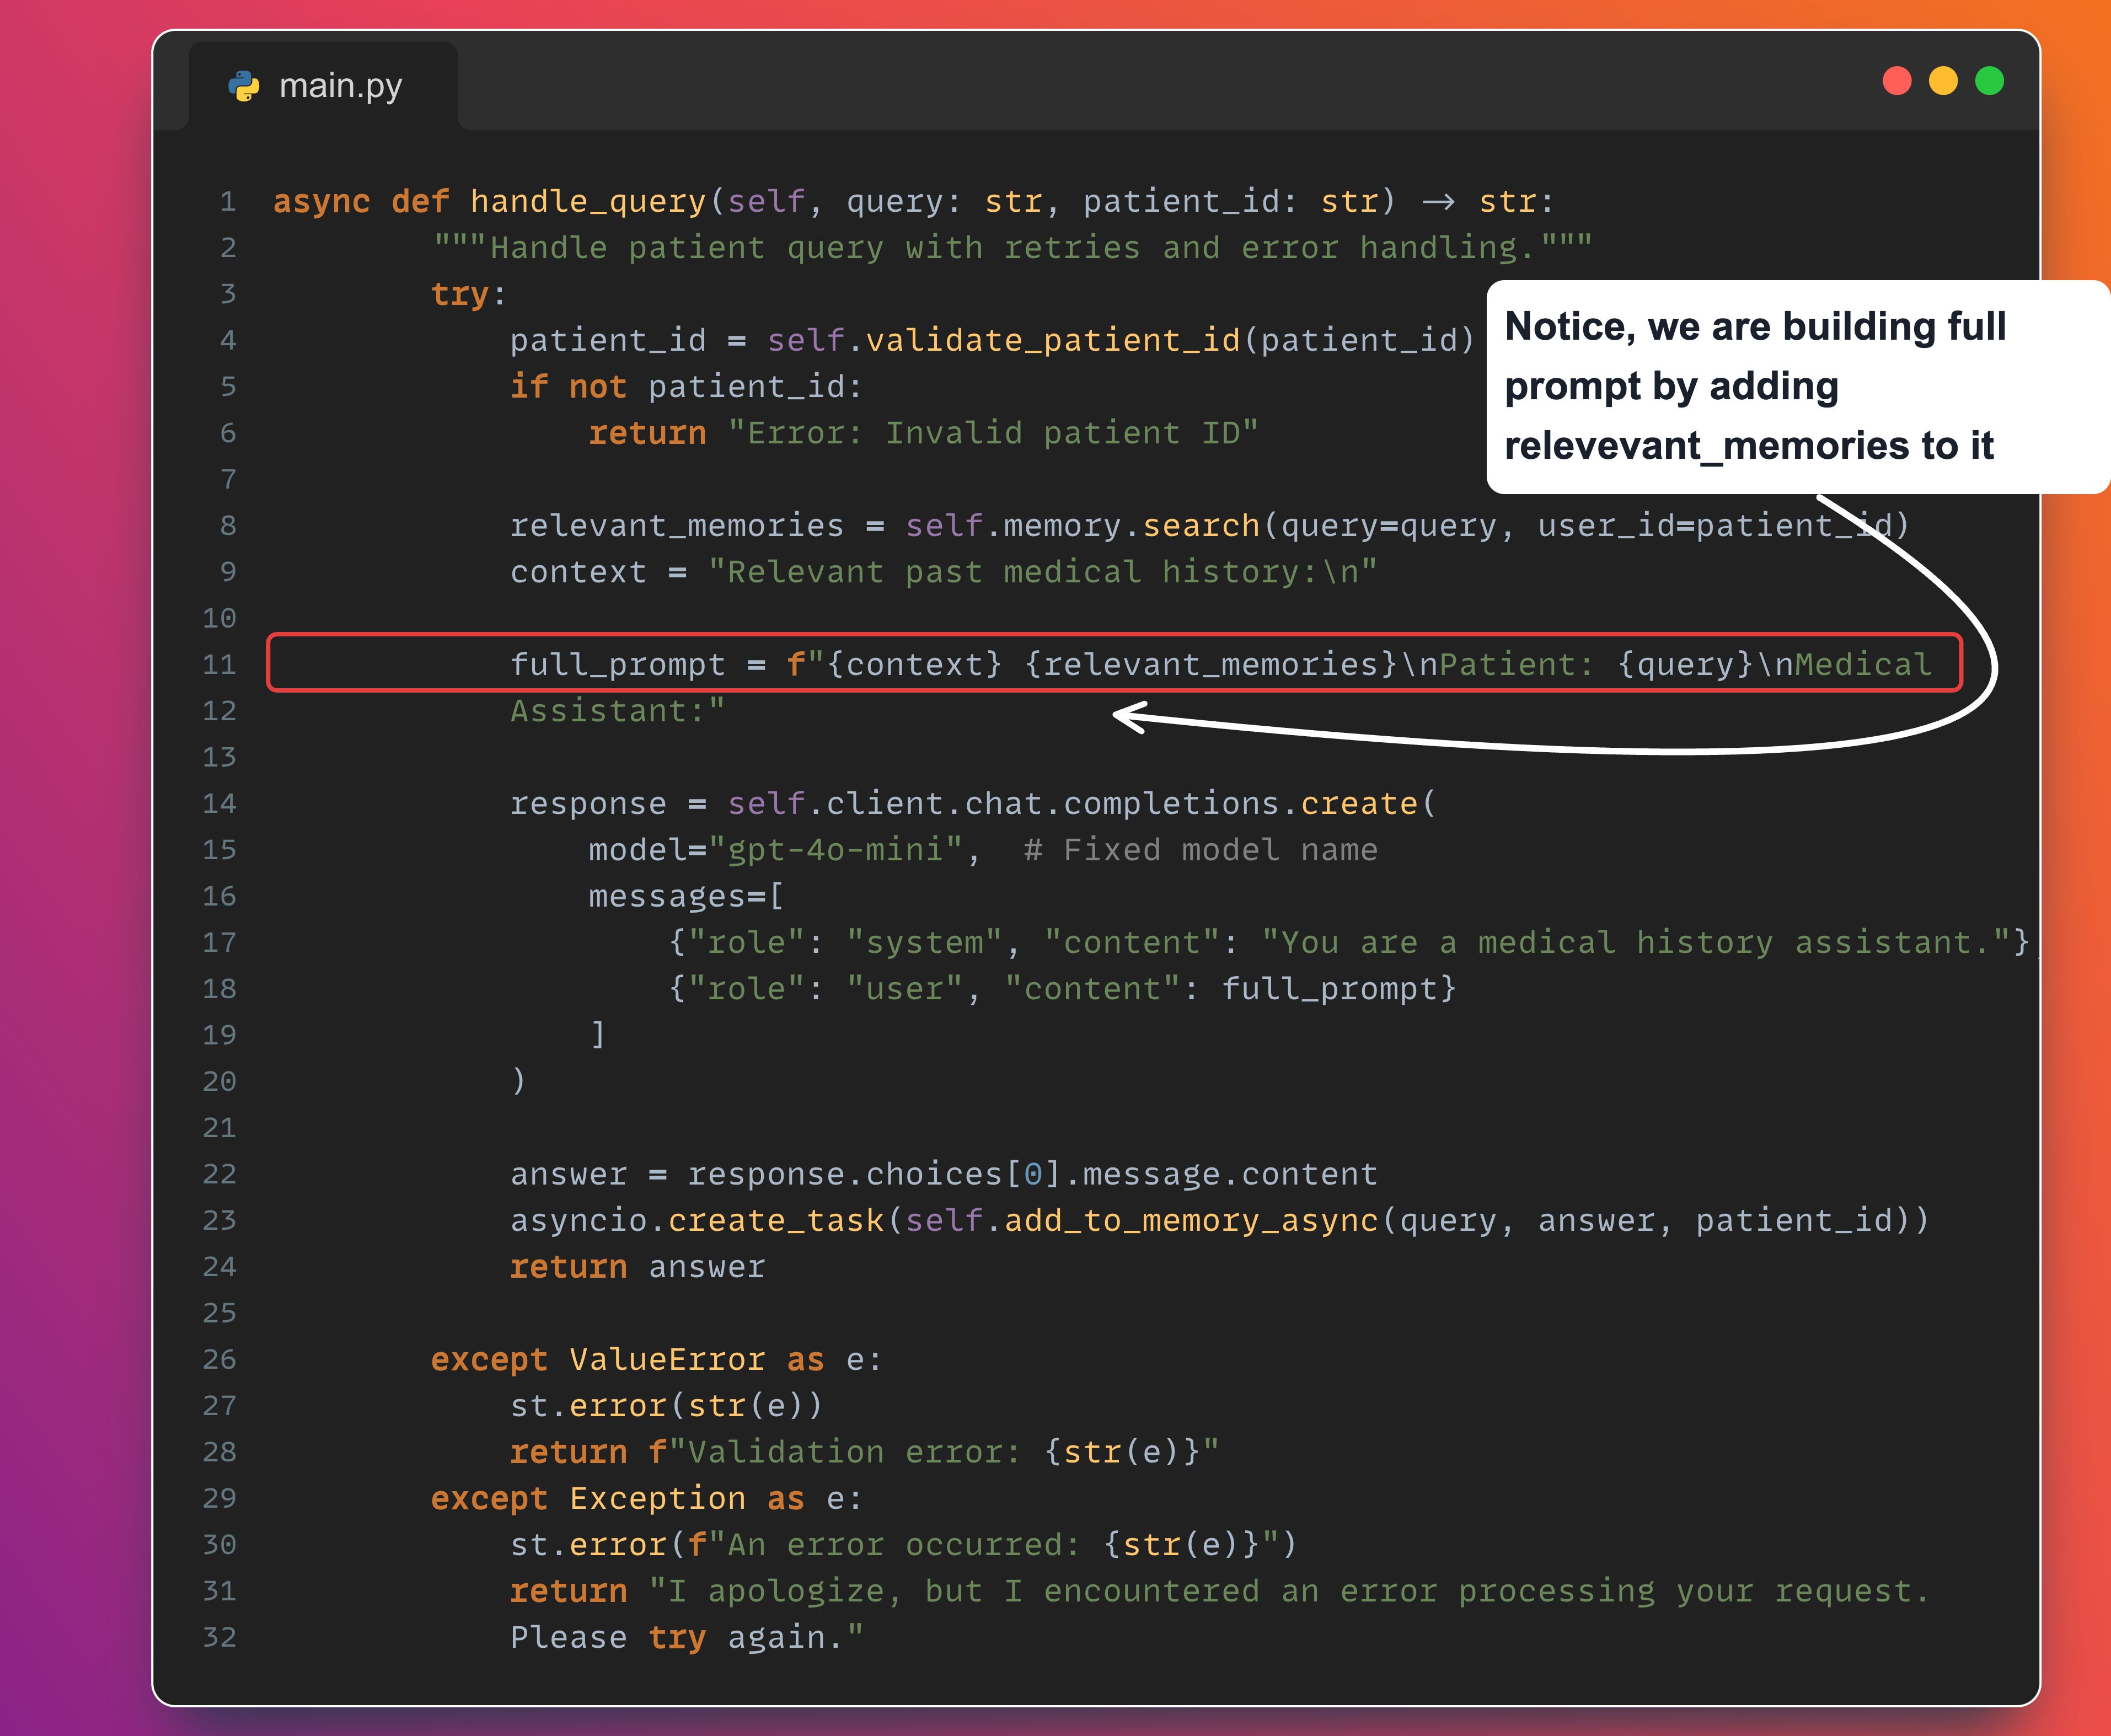
What is happening in background?
When a user submits a query to our AI Assistant, we first retrieve relevant memories and then create a comprehensive prompt that combines these memories with the system prompt. This approach enhances the AI's accuracy in responding to the user and helps maintain a contextually relevant conversation. That's why we request the user's ID when initiating the interaction.
Step 6: Running the App
Finally, the big moment—running the app! The main execution block (if __name__ == "__main__":) makes everything tick. From initializing the assistant to handling the sidebar and chat features, it ensures the app flows smoothly from start to finish.

Since we are using the streamlit as UI, Just hit below command
streamlit run main.pyand you’re good to go. You should see the screen like below,

Here is my git repo where all code can be found - github link
In case you prefer a video of the above explanation, go through my video below. Don’t forget to hit the like button and subscribe if you find the video useful—your support helps me create more valuable content like this!
And that’s a wrap for this edition! Stay tuned for more updates in the next newsletter. Until then, take care and stay curious!